Me

Me

Friday, May 30, 2014

Been a min or two...

I'm an awful blogger!!! I'm so sorry for the lack of posts :(. Spring took over my life with children's sports, gun shows, and well....life. There is, however, a light at the end of the tunnel. Sports and school are ending this week!! Soon I'll be working 4 tens each week and using my Friday, Saturday, and Sunday's to go camping!!!

Before I post about some amazing pancakes I made for my family this last weekend, I would like to share about some amazing changes in my life. I recently made the choice to focus on my health this summer. I started a 30 day system (that may just turn into a a life system) about 12 days ago. This system focuses on removing the toxins and replacing with all the nutrients your body needs and craves. I have been a faithful coffee drinker for at least 10 years and I'm proud to say I haven't had a coffee in 12 days and I have more energy than ever! I also battle with some bad anxiety issues, and I have been feeling so calm now. I've lost 10 lbs (again still only after 10 days) and I couldn't be happier. I have also been feeling  more confident (bought this lovely little bikini) with my body. My husband is starting this Monday and I can't wait for him to receive all the benefits of this amazing system. If any of you want more information about it send me an email or a message!! I'd be more than happy to share!


Now, onto some very important things:

Cinnamon Roll Pancakes

For the pancake:

1 Cup Flour
2 Tsp Baking Powder
1/2 Tsp Salt
1 Cup Milk (I used some leftover buttermilk, to make these vegan you could use almond/soy/coconut milk)
1 Tbsp Oil (it called for Canola, but I used Coconut)
1 Large Egg (sub 1/2 cup of applesauce for vegan recipe)

For the swirl/filling:

1/2 Cup Butter (or Good Earth vegan spread) melted
3/4 Cup packed brown sugar
1 Tbsp Ground cinnamon

For the glaze:
*Now I veered with this one and created something with ingredients I had on hand. The recipe wanted a cream cheese glaze*

1/2 Cup to 3/4 Cup of Powdered sugar
Milk 
Maple Syrup (organic pure if you can)


1. Prepare the cinnamon filling: In a medium bowl, mix the butter, cinnamon, and sugar together. Put into a big zip-lock bag and set aside.

2. Make the batter: In a medium bowl whisk together the dry ingredients (flour, baking powder, and salt). Mix in the wet ingredients (milk, oil, and egg) until it is just combined. 

3. Mix all the ingredients for the glaze in a small bowl. Start with the powdered sugar and slowly add the milk. You want a consistency that's not too thick and not liquid. Once you get that consistency add a little bit of the maple syrup. If you absolutely love the taste of maple syrup add a decent amount, if you only want a hint of it, add less.

4. Pour the batter onto a skillet or your favorite pancake pan. After you have all that will fit in one sitting, cut a corner of the zip-lock bag and start your swirling on the pancakes. Flip them once one side is done and vice versa. Top with the glaze and whatever add ons you'd like. 


I hope you all have a wonderful weekend and enjoy the sun!!!


Based on a recipe from: http://www.life-in-the-lofthouse.com


Thursday, April 17, 2014

Spring Break??? More like Spring 'can I catcha' Break...


Sorry for the long absence, life seems to get crazy in the spring. We just got done with the kids spring break, it seemed a lot longer to me than the kids somehow, haha. The weather has been a little moody, sunshine and almost 70 one day and then 50's and rain the next. I shouldn't complain about that too much, I just heard that the other side of the country got dumped with more snow?!?!? With the start of spring that means the start of kids sports and projects. My husband and I have recently opened up a Military Surplus/Reloading components online store (www.BadgerBrass.com). Every minute of free time lately has been getting this little business setup. I will admit, I have been enjoying doing this with my husband (as I do love doing projects together), it's given us more time doing stuff together than we would normally have. With all this going on, I haven't really had a whole lot of time to bake anything :( , UNTIL last weekend when I looked in the freezer and saw we had an entire shelf full of frozen over ripe bananas. What's a girl to do, but make banana bread. I took it a step further.... I not only made cinnamon swirl banana bread, but I then made cinnamon swirl banana bread french toast. It was a complete success, I'm so happy I thought of doing that. I felt bad depriving my poor family of any baked goods for the last month. The only thing I think I want to do differently next time (and I would have if I had, had more time last Saturday morning) is make some bananas foster to top it off with.

**NOTE these are not the healthiest thing in the world and it would also be very easy to make these vegan, if you would like to know the substitutions feel free to post a comment with your email or send me a message on my Facebook page**

Cinnamon Swirl Banana Bread

For the Bread:

3 Over-rip bananas smashed
1/3 Cup melted butter
3/4 Cup sugar
1 Egg beaten
1 Tsp Vanilla
1 Tsp Baking soda
Dash of salt
1 1/2 Cups flour

For the swirl:

1/3 Cup Brown sugar
1 Tbs Cinnamon
1/2 Tsp Salt (optional, I feel that anytime you make a cinnamon/sugar combo, salt should always be added to enhance those flavors)

1. Preheat oven to 350. Grease up a loaf pan and sprinkle flour on top of that to help it not stick. 

2. Take mashed bananas, butter, sugar, beaten egg, and vanilla and combine with an electric mixer (if you don't have one you can always do this by hand and call it your arms workout for the day ;) ). Once it looks just mixed add the baking soda and salt. Mix on low till just incorporated, and start slowly adding the flower. Try not to over-mix.

3. In a small bowl mix together the brown sugar, cinnamon, and salt.

4. Add half the batter to the loaf pan, then you want to sprinkle 1/2 of the cinnamon mix evenly over it. Add the rest of the batter and top it off with the rest of the cinnamon mixture. 

5. Bake for 50-60 minutes (always keep a watchful eye on it towards the end don't want it to burn or pull it out too soon).


Now for the fun part, making the french toast part. Make sure that the bread has cooled down a little bit, try to achieve room temperature if you can. Now I do most of this just by sight so I'm going to try my hardest to give it a measurement.

French Toast

1 to 1 1/2 Cups Milk (depends on the amount of french toast you are making)
1 Egg
1 Tbs Cinnamon (more if you reallllly enjoy cinnamon)
1/4 Cup Brown sugar
1 Tsp Vanilla

1. In a small bowl start with the milk followed by the egg. Beat the eggs and milk for a minute. Add the cinnamon, sugar, and vanilla and beat some more for about another minute. 

2. Heat up a skillet on med to med high (depending on how hot it gets...you know it best). Take a little bit of butter and put it on the spots where you plan to lay your french toast, move it around a little with your spatula. 


3. Take a piece of your banana bread and dip it in the batter on one side and then the the other, and then set it down on the skillet. Do this for the remaining bread and flip once they start to get a little golden (sometimes especially with banana bread it's hard to see the color change so you can also feel the bread with fast touches so you don't burn yourself. When it feels dry and not gooey or damp anymore, then it's good to flip). 


Now plate your cinnamon swirl banana bread french toast and enjoy the melted cinnamon goodness on top. Due to the nature of banana bread being so sweet, I topped my families with a little butter to salt it up some. 


I hope ya'll enjoy this!!!! Have a very blessed Easter Sunday!!!!

Bread recipe based on http://lovintheoven.com/2010/03/cinnamon-swirl-banana-bread.html

Wednesday, February 12, 2014

A long time ago, in a kitchen far away....

Finally the post I have built up (hopefully not too much haha) accidentally, Star Wars Pancakes. Knowing my love for all things Star Wars, my dear husband bought me these awesome Star Wars pancake molds (from William Sonoma) for Christmas. I can't believe it took me this long to finally use them, but I did and the results weren't too shabby.


The pancake recipe that I am going to give you is my go to recipe that I modified to be vegan. It has relatively low sugar and really you can use whatever flour you'd like in it. When I normally make these pancakes (pre-star wars molds) I add chunks of strawberries and bananas or blueberries and lemon zest. I haven't tried adding the fruit with the molds yet, as it would ruin the look, instead you can always make a compote out of the fruit and use it that way. The great thing about this pancake mix, is that you'll have 2 more servings to set aside and use on a rainy day (allowing you not to have to purchase pre-made mixes from the store, something I always strive to do).

Pancake Mix Recipe
1 1/2 Cups All purpose flour (or gluten free flour of your choice)
1 1/2 Cups Whole wheat pastry flour
6 Tbsp Yellow cornmeal
6 Tbsp Sugar (or your favorite natural sugar replacement coconut sugar, raw sugar, beet sugar, stevia...ect)
1 Tbsp Baking powder
1 tsp Baking soda
1/2 tsp salt

1. Combine all of the ingredients together measure out 1 1/3 Cup and store the rest in a cool dry place to use on another day.

Vegan Pancakes
1 1/3 Pancake mix (you just made)
1/2 tsp Ground cinnamon
1 Cup You choice milk** (I use almond, you can use soy, rice, hemp...ect)
1/4 Cup Water (now be careful here I usually use half the amount of water asked for and add more if I find the batter to be too thick....otherwise you'll end up with watery thing pancakes)
1/2 Cup applesauce** (I use my kids apple sauce cups as they usually end up measuring 1/2 cup)
1 Tbsp Oil (you can use whatever oil you'd like, I use coconut oil and would advise using a healthier oil that doesn't have too strong a flavor)
1 tsp Vanilla extract

** These are the only two substitutions that make this meal vegan. I use the almond milk to replace normal milk. You can also use a cap full of apple cider vinegar in the almond milk to get a buttermilk flavor effect. I use the applesauce as an egg replacement. You can use just about any pureed fruit as an egg replacement.**

1. Combine the pancake mix and cinnamon in a large bowl. In a smaller bowl combine the milk, water, applesauce, oil, and vanilla. Pour the liquid into the pancake mix and mix until there are no chunks left.
NOTE- This is the time you'll decide if you need to use the rest of your water or not, if it looks way too thick then slowly add some more and mix.. repeat if necessary.

If you decide to add fruit and make non molded pancakes do that now by folding them in gently

2. Coat a large nonstick skillet with cooking spray or wipe with some of the oil you used earlier. Measure out 1/4 scoop fulls of batter and pour on skillet. These generally don't take too long to cook, so just keep an eye on them. Get them to the browned color of your choice and flip. With the molds you want to ensure you grease it thoroughly before pouring in the batter. They will want to stick, so when you think it's time for them to turn use the hilt end of a butter knife to push them out.

Time to eat!! We usually use a dark agave syrup on these to help keep the sugar intake down, but if you can always top with honey, fruit, or real maple syrup.

I hope you all enjoy!!! Feel free to ask any questions you may have.

May the force be with you...


Thursday, February 6, 2014

Follow my blog with Bloglovin

<a href="http://www.bloglovin.com/blog/11727025/?claim=xv3h5f37a34">Follow my blog with Bloglovin</a>

Monday, February 3, 2014

How bout them Seahawks...

First off, as a member of this fine state for the last 27 years of my life let me just say: WOOOOOOO SEAHAWKS!!!!


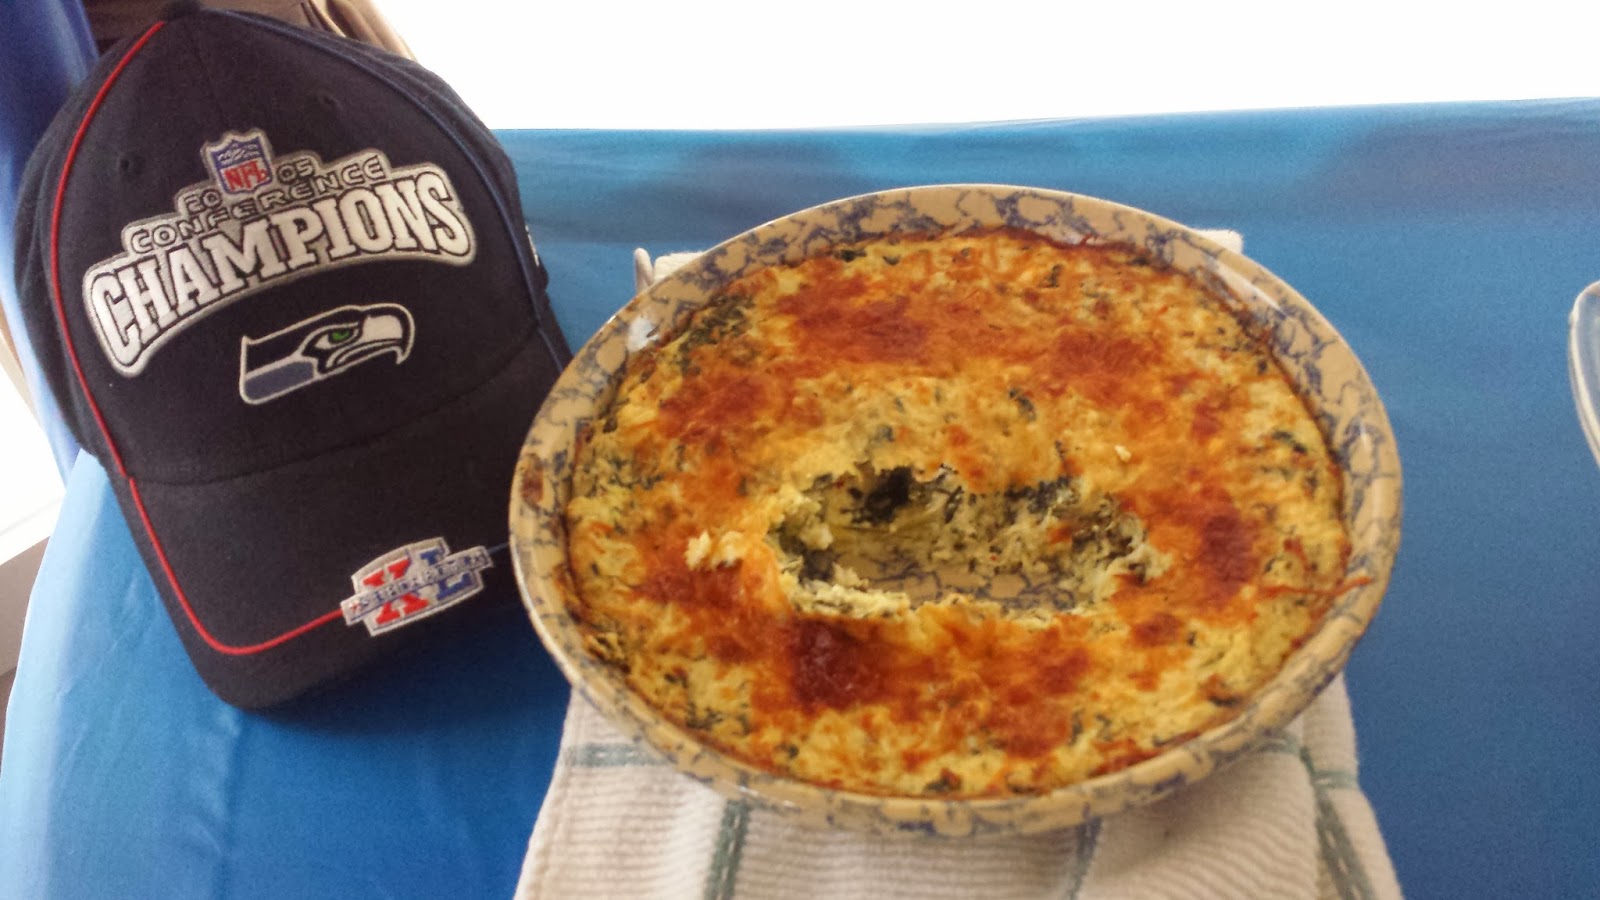
Alright, got that out of my system. I hope that you all had a great weekend and were able to watch the game. To those of you Broncos fans out there, I'm sorry for the loss. Maybe next year? I spent the weekend in Olympia, WA doing some training for work. Thankfully I was able to bring my husband a long with me to turn it into a sort of mini vacation.  Capping my lovely little getaway off, was Superbowl Sunday. We ended up having a couple people over for a low key evening full of blue and green wins. On the menu for this evening were 3 things: Buffalo Cauliflower bites, Ryan's family's Swedish meat balls, and spinach artichoke dip. I know that I said I would share my vegan star wars pancakes, but  I figured this close to the Superbowl I should share some of the amazing things we made. 
Seeing as we are a mixed household of meat eaters and veggie connoisseurs, I had to have a little bit of everything for our snacking pleasures. I've had a lot of requests for these buffalo cauliflower bites that I tried recently. I liked them so much I decided to make that my snack of choice (and any other veggie fans) for game day. The texture to these ends up being very similar to that of a potato, making these the perfect filling snack (especially when you're craving buffalo wings and don't have any). The next time I make these I think I'll start messing with sauces and have some fun with it.


For the next snack, I thought about my husband and the one thing he always tries to order when we go to restaurants (I say try, because I'm not the biggest fan...it really needs to impress me to order it): Spinach artichoke dip. This dip ended up being one of the best ones I've ever tasted (the whole not eating dairy thing ensures I usually only get to taste them). The texture was creamy with no big random chunks of artichoke and the taste was addicting without being overpowering. The husband loved it as did our guests (there wasn't any left), I'd say this recipe is a keeper. 

Wrapping this up is my husband's family's Swedish meatballs. This specific recipe is one that his uncle regularly makes when they visit their snow camp in Michigan, and has the one thing Ryan finds most important in a meal.....meat. I can honestly say that every dish Ryan has made not only smells amazing while it's being made, but is jam packed full of flavor. If you're ever looking for a heavier grazing food for a party or event, this is it.


Vegan Buffalo Cauliflower Bites

Ingredients:

1 Cup Unsweetened Almond Mlik
1 Cup your choice of Flour (you can use whole wheat, gluten free, rice...etc)
1 head of Cauliflower chopped
1 tsp Onion Powder
2 tsp Garlic Powder
3/4 Cup Buffalo Sauce (any brand that you'd like).
1 Tbs Earth balance or other type of vegan butter melted

1.  Preheat oven to 450 F
2. Combine milk and flour together until there are no lumps left, and then add the onion and garlic powder.


3. Grab a baking sheet and make sure that it is greased well (you can use coconut oil or any oil you'd like really). Dip each piece of cauliflower into the batter and place on the baking sheet. Bake for 15 minutes.


4. While it's baking combine the buffalo sauce with the melted butter. Once they are ready to come out dip each piece into the sauce and place back onto the baking sheet. Place back in over for 5 minutes and enjoy!


Spinach Artichoke Dip

Ingredients:

8 oz Cream Cheese softened
1/3 Cup Parmesan Cheese plus more for topping
1/3 Cup Sour Cream
1/3 Cup Mayonnaise
10 oz Frozen Chopped Spinach thawed and drained
1 Cup coarsely chopped canned artichoke hearts
4 cloves of Roasted Garlic smashed*** (instructions to come)
1/4 tsp salt
1/2 tsp red pepper flakes

1. Roast your garlic. Place 4 un peeled cloves of garlic onto a baking dish and roast at 350 F for 25-30 min. Once it's done you will squeeze out the cloves, discarding the peels (all the hard stuff). 

2. Set oven to 400 F. Combine the cream cheese, Parmesan cheese, sour cream, mayonnaise, spinach, artichokes, garlic, salt, and red pepper flakes. Stir until it is all mixed together and there aren't chunks of cream cheese. Top with as much extra Parmesan cheese as you'd like. Bake for 35-40 minutes. Serve warm with baguette slices, pita chips, or whatever you would like.


Swedish Meatballs

Ingredients:

4 lbs Lean Ground Beef
1 lb Breakfast sausage (like the kind you'd find in a tube)
2 Eggs
2 18 oz bottles Sweet Baby Ray's BBQ sauce 
A-1 sauce
Worcestershire sauce
1 1/2 tubes of Ritz Crackers
1 Sweet Onion
2 big cans of Cream of Mushroom soup
Honey
Lawrys Seasoning Salt
Black pepper
Olive Oil

1. Pre-heat oven to 350 F. Chop onion and saute with olive oil and a little bit of A-1 sauce. Once browned set aside.

2. Combine the meats in a large bowl. Add the BBQ sauce (you may not need all of the second bottle, I'll leave that judgement up to you) and mix in with hands. Next you are going to add in the A-1 and Worcestershire sauces, you just want to put in a light amount of each. It won't be as much as the BBQ sauce. Now an option that you can do as well, but it isn't necessary, is adding a little bit of red wine and allowing the meat to marinate over night. 


3. Mash the crackers inside of their plastic tubing and pour onto the meat. Mix up again with hands until all combined. Add the onions mix and then sprinkle a decent amount of Lawrys seasoned salt and black pepper. Don't use too much, or you'll have some very salted balls... 


4. Get out a baking sheet coated in olive oil. Roll balls out of the meat a little smaller than a baseball and set them on the sheet. Once you have rolled all the balls put a dab of honey on the top of each. Place the pan(s) in the oven and bake for 30 min. After 30 min rotate each meat ball and bake for another 30 minutes. 


5. Meanwhile get out the ol crockpot and add the cream of mushroom soup. Add the meatballs to this once you've pulled them out and set it to high for about 10 minutes. After that you can set it to low, stirring from the bottom occasionally. THEY ARE READY!!!

I hope you all have an amazing week. Drive safe and stay warm.

Wednesday, January 29, 2014

First Post!!!!!

The first post. This is supposed to be the important one, right? I hope I’m able to do all the things a good blog is supposed to do (capture your attention, relate to you, and entertain you all at once).  Not only is this my first post, but this happens to be my first blog. Some friends of mine expressed interest in seeing a blog I may create so here’s my attempt:  

My daughter recently turned 7 years old. I always say that children’s birthdays are a weird mix of emotion for a parent. At one end you are so proud of the wonderful little human being they have become and will continue to grow into, and at the other end you have this sad little emptiness that is caused by knowing you’ll never be able to cuddle that little baby you once had, again. Maybe I’m alone in feeling this, but as she is my oldest it breaks my heart to know the older she gets the less she will need me for certain things.


For Ms. Bella’s birthday we ended up going to a local tea house called the Brambleberry Cottage/Tea House. The girls got to dress in their finest tea dress and enjoy tea, scones, sandwiches, and desserts. It was a very memorable 7th birthday.


 For our family gathering I asked Isabella what she would like me to make for her and she gave me free roam. I generally get a little overwhelmed when someone does that, haha, but luckily I had just read a recipe that I had been really wanting to make. White Chocolate Truffle Cupcakes decorated with some amazing Star Wars cupcake accessories my lovely husband gave me for Christmas.


They turned out amazing. These cupcakes are definitely more on the sweet side, so those of you that are more into savory may want to alter it a little to achieve this (maybe use a dark chocolate truffle instead of white). Everyone’s favorite part was the center of the cupcake where the truffle was added.  I apologize for not having pictures of it along the way and only an end result, I didn’t know I was going to start this blog when I first made them.  So without further ado, the recipe:

White Chocolate Truffle Cupcakes

Cupcake
1 ¾ Cups  cake flour 
**I didn’t have any on hand so I used regular which worked just fine as well**
2 tsp  baking powder
2/3 Cup  whole milk
½ tsp  double strength vanilla 
**again, didn’t have any so I doubled my normal vanilla**
4   egg whites, room temp
6 Tbsp  unsalted butter, softened
½ Cup  granulated sugar
¼ Cup  sour cream
12  round white (or milk or dark) chocolate truffles (I used Lindor truffles) unwrapped

Frosting and Garnish
6 oz  white chocolate for baking chopped
8 oz  cream cheese softened
½ tsp double strength vanilla 
**if you don’t have just double normal vanilla**
2 Cups  powdered sugar
(optional)  white chocolate to make curls for decoration

1.       Preheat oven to 325°F. Place your paper liners in your cupcake/muffin pan. Whisk flour and baking powder in a small bowl. In another bowl or measuring cup combine the milk and vanilla. In another bowl use a hand mixer (or if you have more than one bowl for your kitchen aid/mixer use that) and beat the egg whites on high speed until stiff peaks form (you will know this when they look more solid and if you were to lift the beaters out of the bowl the eggs will keep the form they make). In your mixer bowl (last bowl you will need I promise!!!) beat butter and granulated sugar on med-high speed until they are fluffy, beat in sour cream until smooth. On med speed, add the flour mixture in three additions, alternating with the milk mixture in two additions. Mix until smooth. With a hand whisk, whisk in 1/3 of the egg whites. Once it looks incorporated fold in the remaining egg whites (this means don’t just keep stirring it, fold it… looks slower than a stir. Google if you aren’t sure what that means). Once it’s all mixed together take a large ice cream scoop (or whatever you have that will make your life easier /cleaner to get the batter into the paper liners) and put a scoop in each paper liner. You will want it to be about 3/4s full. If you are questioning if you put too much or it’s too close to the top take some out, as these cupcakes do rise up a decent amount.

2.       Bake 17-20 minutes or until wooden pick inserted in centers comes out clean.  Remove the pan from the oven and place on a cooling rack. Using a sharp paring knife (or any sharp knife really)  make a ½ in “X” incision on top of each cupcake. Press one truffle into the center of each cupcake. It should be flush with the top of the cupcake once inserted. Remove the cupcakes from the pan and allow to cool on cooling rack (about 30 minutes or until they hit room temp).

3.       Frosting: place white chocolate in a small microwaveable bowl (I guess I lied you needed another bowl). Microwave for 20 seconds stir, repeat. Do this until the chocolate is mostly all the way melted and stirring will melt the rest. Set aside to cool a little. In your cleaned mixing bowl, combine melted chocolate, cream cheese, butter and vanilla, and beat on med speed until well blended. Slowly add powdered sugar and beat well (but do not over beat).

4.       Decoration. Now this part is mostly up to you. I enjoy getting a frosting bag and a tip and going about it that way. If you want tips on how to use said frosting bag/tip let me know and I’ll make a post about it. You can use whatever accessories you would like to decorate these cupcakes, although with their beautiful white coloring (both cake and frosting) I personally think something equally white or metallic goes well. If you have chosen to use white chocolate curls to put on top here is how to do it: place two squares of baking chocolate on a piece of parchment paper, microwave on high for 10 seconds. Using a vegetable peeler create curls.


Please feel free to ask questions or comment on your results with making these. Until next time, good luck with everything!!!